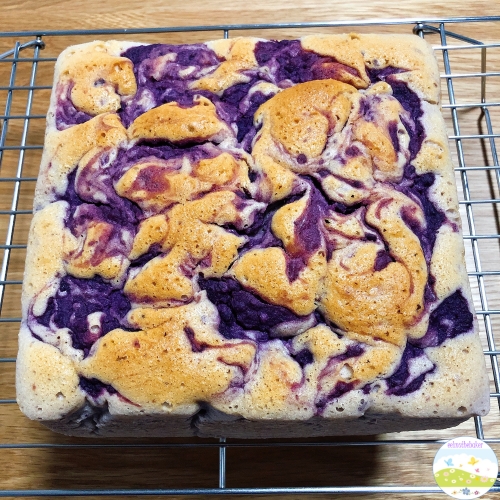
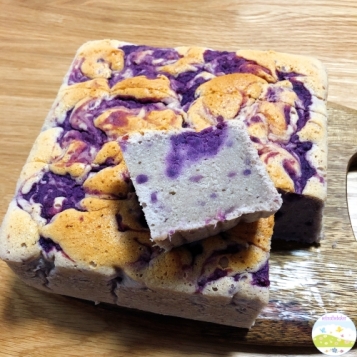
whipped cream cake

whipped cream cake

This is the same cake I attempted during Chinese New Year 2013. After that disaster, I tried another time with the same depressing result. I was determined to succeed and determined to figure out what happened. So this is my third attempt.

Reading through the posts on Rose Levy Beranbaum’s website, one of the posts was by a lady who attempted the cake but failed, with the same result as mine. The reply given was the cake was under-baked, resulting in the dense look. Under-cooked? I remembered keeping to the appointed time.

whipped cream cake1

This time, I made sure the oven was preheated at least half an hour before the cake went in. In addition, I changed the type of cake flour from the Nissin Violet flour I had used in the previous two attempts to Prima Cake flour. I used up the precious 47% fat Meiji Hokkaido whipping cream for this recipe.

During baking, the cake rose as usual, though not till the top of the bundt pan. It rose around 3/4 of the height only. When I saw that, my heart kind of sank. I thought the cake failed again. Haha.

I held my breath, crossed my fingers and waited for the cake to cool down before I could cut to check.

whipped cream cake slice

Yippee! It worked! *dances madly around*

So what caused the dense uncooked cake in the previous two attempts? Only God knows. I suspect it was a combination of the cooking time and the flour used.

For my own reference, I list the ingredients and the steps:

Whipped Cream Cake (adapted from Rose Levy Beranbaum)

  • 225 grams cake flour
  • 2 teaspoons baking powder
  • 3/4 teaspoons salt
  • 180 grams castor sugar
  • 348 grams heavy whipping cream, cold
  • 150 grams eggs
  • 1 teaspoon pure vanilla extract
  1. Grease and flour a 10 cups capacity bundt pan. Preheat oven to 190 C (175 C if pan used is dark colored)
  2. In a large bowl, sift cake flour, baking powder and salt. Set aside.
  3. In a bowl, whisk eggs lightly. Add in vanilla extract and whisk till combined.
  4. In the bowl of a stand mixer, whip cream until stiff peaks.
  5. With the mixer on low, gradually add in egg mixture. Switch to medium speed for a minute to combine fully.
  6. Gradually add in sugar and run the mixture for 30 seconds to incorporate the sugar. Stop the mixer.
  7. Fold in the flour carefully in 2 additions, until just combined. Do not over-mix.
  8. Scrape batter into prepared pan, run through with a blunt knife and smooth the top with a spatula.
  9. Bake for 35 minutes.
  10. Cool cake on a rack in the pan for 10 minutes before turning cake out onto the rack and cool completely.

This cake is delicious! The 47% fats whipping cream really makes a difference in taste. Creamy and wonderful. But I can only eat a small tiny corner. Not even a mouthful. Sobs. I need to lose weight. :(

wholemeal mantou

wholemeal mantou

Soft, fragrant mantou for breakfast. This is heavenly!

The search for a good mantou recipe that remains fluffy even when cold remains elusive. Many recipes use copious amount of baking powder to achieve the fluffiness, but even so, by the next day, the mantou is considerably harder compared to yesterday.

This recipe, as warned, will not be fluffy like others, because it relies only on yeast and does not contain any baking powder. I found them delicious and though did not have a very fluffy texture, on eating the next day, I found they did not become any harder as well. The texture remained the same, slightly dense and chewy.

What won me over is the usage of vegetable oil. I detested using shortening, which to me had a kind of…petroleum like smell. This smell is quite apparent, to me, especially when kneading it into the dough manually. Since then, I have been put off shortening.

Wholemeal mantous (adapted from frozen wings)

  • 250 grams cake flour
  • 80 grams wholemeal flour
  • 3 grams instant yeast
  • 25 grams castor sugar (I used 50 grams)
  • 200 grams full fat milk
  • 10 grams canola oil
  1. Place all flour, yeast and sugar into the bowl of a standing mixer fitted with a dough hook.
  2. Combine milk and oil in a jug.
  3. Turn on the mixer to low and gradually add in liquid.
  4. Turn the speed to medium-low and knead for 10 minutes, or until the dough passes window-pane test.
  5. Let the dough rest for 5 minutes.
  6. Turn out the dough onto a floured work area and lightly knead for 2 minutes. Roll the dough to around 20 x 30 cm and roll up the dough swiss-roll style from the longer side. Pinch the seams well to seal. Slice into 6 slices.
  7. Place each mantou, seam side down, onto a small piece of grease-proof paper and arrange inside the steamer, spaced out as much as possible to allow for proofing.
  8. Proof for 40 minutes.
  9. At the 30th minute, start boiling the water for steaming.
  10. Steam at medium high heat for 25 minutes. When done, open the lid and allow the steam to escape for 5 minutes before removing mantous. This will reduce shrinkage.

wholemeal mantou inside

I am submitting this entry to Aspiring Bakers #31: Bao Ho-Chiak 包好吃 hosted by Miss B of Everybody Eats Well in Flanders.

Note: I increased the sugar because I intended to eat these plain and I like my mantous sweet. If you intend to use jam or any other condiments, please adjust sugar accordingly.

croissants

croissants

My maiden attempt at one of the most time-consuming pastries ever….

It looks okay doesn’t it? However, all is not well in croissant-land. Due to a possible case of over-handling and under-rolling, the inside is not as light and the structure did not have the desired “honeycomb look”. I was disappointed, but it was expected, since I had so much trouble handling the dough.

The recipe I followed was from Bourke Street Bakery. I found the recipe at Milk and Honey and followed it as best as I could. Croissant making will always be difficult for me because of weather and because I do not have an air-conditioned kitchen or work area. We have a humid and warm weather all year round, so there is no escaping or putting this off until winter period. It is warm all the time! Even when it rains, it is not cool enough. We’re lucky if the temperature ever drops to 24 C.

Kneading the dough by hand was difficult, because of the quantity. I doubt my poor mixer could stand the amount of dough either. I needed the exercise anyway, so I decided to use manual power. By the end of the entire process of making croissants, my whole body ached like mad. What a good work-out!

Laminating the dough took me a whole day. The butter kept poking out of the dough. I did the best I could and just sprinkled flour on the bits poking out and continued the turn and roll and fold. Baking was done in 2 batches. The first batch, I proofed the dough for 1 hour and baked it in a 190 C preheated oven. Preheating was done perhaps 15 minutes before placing the croissants in. The results were not stellar. See picture below. The insides were somewhat clumpy and looked like the dough didn’t rise very much.

croissants inside1

For the 2nd batch, I rested the shaped croissants in the fridge overnight. I read on the net that steam helps the dough to rise further and become lighter and flakier. Hmm. Worth a try. What was recommended was to spritz some water into the oven during preheating and just before the croissants went in. It was also mentioned to preheat the oven for a while before placing the croissants in.

So this round, I placed a small amount of hot water into a stainless steel bowl and placed the bowl at the bottom of the oven. The oven was preheated to 200 C for half an hour before the croissants went in. The results yielded croissants that were slightly better in terms of flakiness. The crust was crispier and the insides, though it looked somewhat the same, was not as “doughy” as the first batch in taste.

croissants inside2

Using the sides cut out during shaping, I made some chocolate croissants by rolling in some 55% cocoa chocolate. These, of course, tasted divine. How can one ruin anything filled with chocolate? :)

chocolate croissant

Second Attempt

There are 3 variations from the Bourke Street Bakery croissants recipe that I can find on the net. Some may be typo error,whilst others differ in the amount of milk used.

For my second attempt, I followed the recipe from thelittleloaf, which uses less milk, halved the recipe and used salted butter. But I made a mistake of letting the dough proof outside for an hour before placing it into the fridge. This resulted in a tough dough. The butter was literally coming out from the tough dough no matter how long I rested the darn thing. I huffed and puffed and perspired (not into the dough, of course) my way through 3 folds and the end result was not good. Sob.

croissants 2

Third Attempt

By now I am getting pretty tired of rolling and butter squeezing its way out of everywhere.

This time I fall back to the recipe from the first attempt above and halved the recipe. Instead of using hand kneading, I used my KA mixer. Definitely faster and less taxing, though I miss out on the workout. Ha!

I stuck the dough in the fridge without proofing and left it overnight. It was definitely an improvement in texture and made rolling so much easier. The next morning, I locked in the butter using an English lock-in method and did a book fold, as read on Faraway from Home. I then did 2 more folds before rolling it out for shaping. Yes, I over-folded. Ahhh!

The result is this floppy dough that separated easily and shaped into the ugliest croissants ever seen. :(

croissants 3

But, the plus point is, at least the insides are softer and more bread-like in texture with some slight (very slight) honeycombs. Ah well. I think I’ve had it with croissants for a while. It is not easy making these in a country blessed with warm weather throughout. Even though I made sure to chill the dough between rolls and folds, it was still a nightmare handling the dough. I must have used up my entire collection of cursing and swearing vocabulary (silent type, of course, or else will get the smack in the mouth from Mother) during the making.

croissants 3a

There is still much room for improvement.

Croissants can be made at home and the ingredients are simple. But the process is long and exhausting, particularly if attempting these in warm weather and without an air-conditioned kitchen or work area. The results may not be what you expect but it is challenging and satisfying (because you will curse and swear).